How to host a Minecraft server
The online multiplayer mode in Minecraft is often considered to be the heart of Minecraft. To play together on the internet you need a server, which fortunately can be set up in just a few steps.
Free Cloud Server Trial from IONOS
Try out a Cloud Server for free now - test your IONOS Cloud Server for 30 days!
What are the basic system requirements of a Minecraft server?
As with any game, Minecraft places a number of demands on your system. Fortunately, thanks to Minecraft's popular pixel graphics, these requirements aren't too high. Nevertheless, it's worth remembering that Minecraft's resource requirements increase with the number of players using your server. In larger gaming groups, you'll need more RAM and disk space. You should definitely cover the following basic system requirements for your Minecraft server:
- CPU (processor): Intel or AMD (two cores or more), preferably 2 GHz or higher, strong single-core performance is desirable
- RAM (memory): At least 2 GB RAM for 1-2 players, 5 GB RAM for 3-6 and 8 GB RAM for more than 6 players
- Operating system: Minecraft is available for all major operating systems, but the operating system requires additional resources
- Bandwidth: 45 Mbit/s is sufficient for more than six people
- Disk space: At least 2 GB for 1-2 players, 18 GB for 3-5, 35 GB for more than 6 players
On Linux, you can use Minecraft as a console program and save resources this way. However, to do this you need to be familiar with the Linux command line.
Which IONOS server is the right choice for your Minecraft server?
There are various options for servers. With IONOS, you have the following three choices:
- vServer: A cloud-based server solution with monthly billing
- Cloud server: A cloud-based server with minute-by-minute billing
- Dedicated Server: An affordable option for a server that has enterprise hardware just for you
With the latter model, you can also choose whether you take over the administration of the dedicated hardware or opt for a managed server. solution whereby experts oversee the software installation and management.
Minecraft server options from IONOS
Whichever server model you choose, at IONOS you’ll find various packages that differ in terms of the performance offered. Which of these packages is suitable for you depends on how large your Minecraft world is and how many players are going to be active on your Minecraft server at the same time.
Choosing the right server can seem overwhelming given the wide range of choice. To help you find the right server, we’ve put together a handy overview with different scenarios:
Use | Recommended IONOS server |
1-2 gamers in a small Minecraft world, occasionally online | |
1-2 gamers in a small Minecraft world, always online | |
3-5 gamers in a midsize Minecraft world, occasionally online | |
3-5 gamers in a midsize Minecraft world, always online | |
6+ gamers in a large Minecraft world, occasionally online | |
6+ gamers in a large Minecraft world, always online |
Step-by-step guide to creating a Minecraft server (Windows Server)
Once you’ve decided on a suitable server, you can now create and set up your Minecraft server. Whether you choose to set up a Minecraft server via Linux or Windows is up to you.
Extensive instructions on how to create a Minecraft server for all operating systems are provided by the official Minecraft wiki.
In the following tutorial, we’ll show you how to get a Minecraft server running on Windows Server 2016 as an IONOS Cloud Server customer.
Step 1: Create a connection to the server
The first step is to establish a remote connection to your server. If you have not yet set up access, you can do this directly via the IONOS Cloud Panel. To do this, first log in to the Login page with your login data.
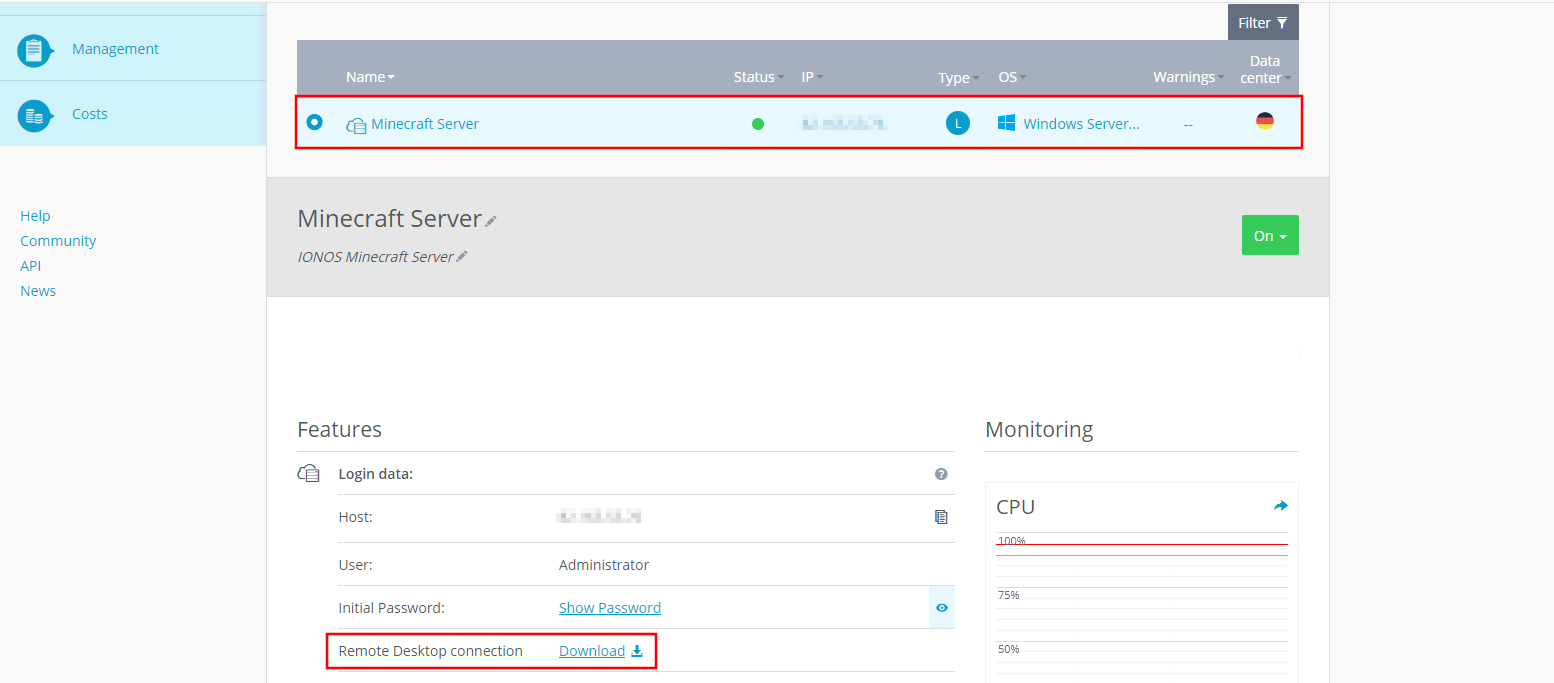
Select Server & Cloud from the menu and click the server you want to install and host Minecraft on from the listing. Scroll down and press the download link next to Remote Desktop Connection:
Either select Open with directly or open the file by double-clicking it after the download. Connect to your server by entering your login details. These can also be found in the Cloud Panel under the Users and Initial password tabs. When you connect to the server for the first time, you will see a warning about the security credentials. To continue, simply click Yes here. This will establish a remote connection to the server.
Step 2: Install Java
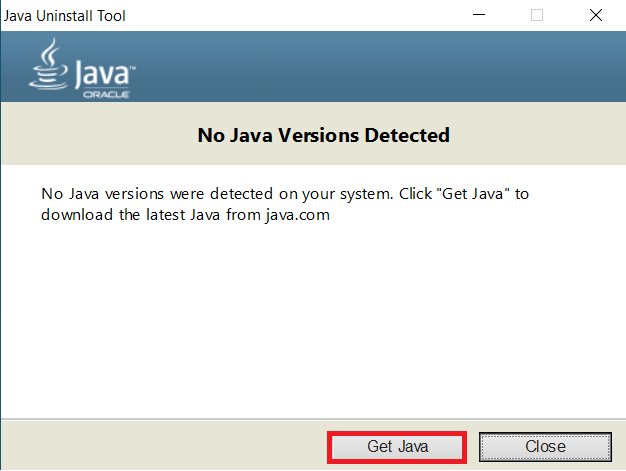
The official server software for Minecraft to date is the Java edition. Check your system for an up-to-date version of the runtime environment. To do this, download the Java Uninstall Tool. This examines the previously installed Java versions on your system. If no Java version is found, the tool will notify you and offer a Java download. Click the Get Java button to be redirected to the Java download page.
Step 3: Install the Minecraft-Server
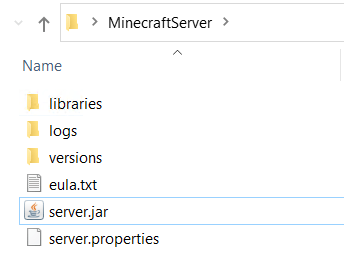
Download the recommended software version for the server (Minecraft: Java Edition server). Then create a new folder anywhere on your server system and double-click to run the downloaded JAR file to start the installation. A new folder will be created automatically. Installation can take a few minutes.
Accept the end user license agreements by opening the eula.txt text file and replacing the “eula=false” entry with “eula=true” and saving the changes.
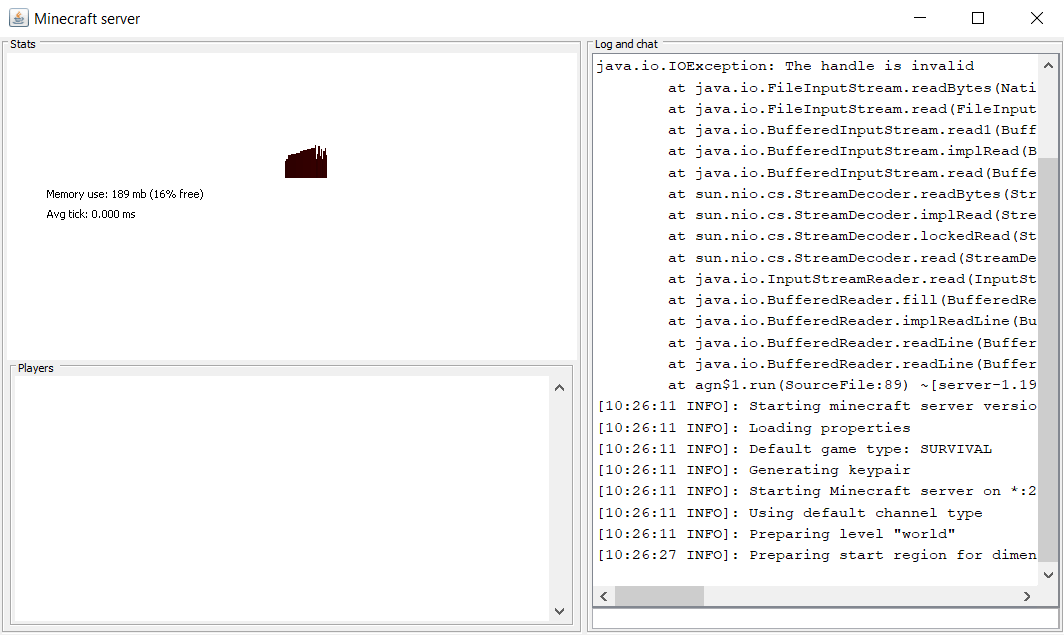
Click the server JAR file again to have your Minecraft server created. This process may take a few minutes.
Step 4: Share port
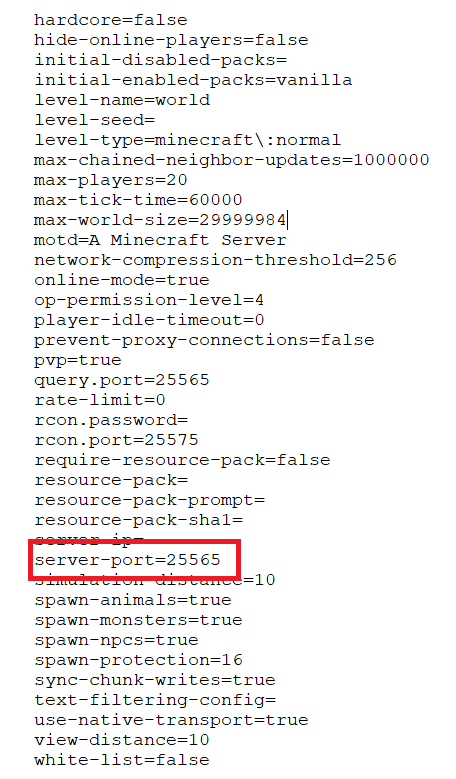
Your Minecraft server must be accessible via an open port for all potential players on the local network or internet. By default, Minecraft provides the TCP port 25565. To check this or to assign a different port, you can open the server.properties file with any text editor (e.g., WordPad) and check or adjust the number at the entry “server-port=...”.
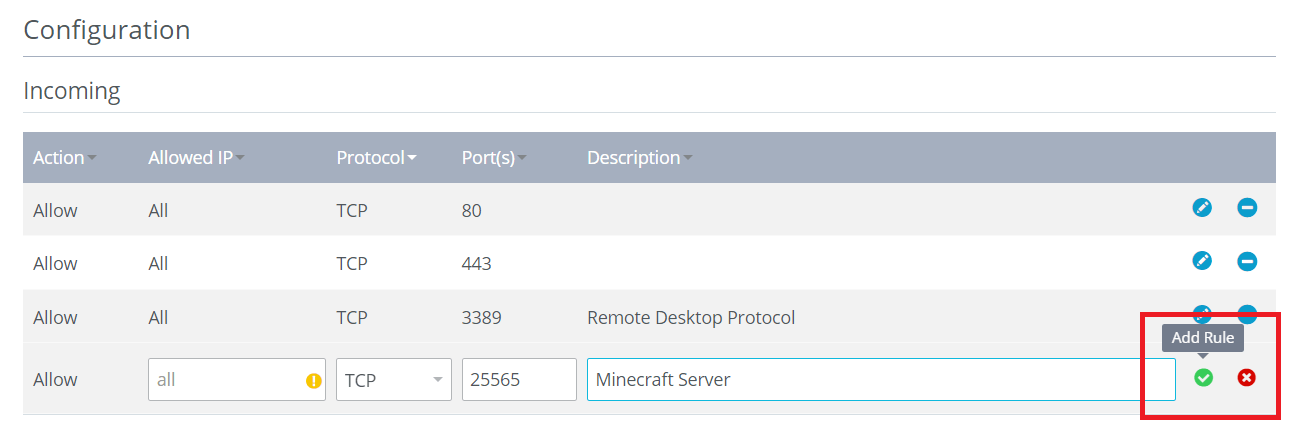
Afterwards, you have to open the respective port on your server. To do this, call up the IONOS Cloud Panel again, switch to the Server & Cloud area and select Network and then Firewall Policies in the left-hand menu area.
Click on the installed operating system and scroll in the following menu to the Incoming menu area. You will see some port entries that are opened by default on the IONOS servers for external communication, for example, port 80 for incoming and outgoing traffic from web servers. In the input line, enter “port 25565” or the port you want to use for your Minecraft server. Leave the field Allowed IP empty. Optionally, you can write a description for the port you want to use. Finally, click on Add rule.
Step 5: Join the server
Now your Minecraft server is ready to go. You can now invite Minecraft Java Edition owners to explore your multiplayer game world at any time. To do this, you just need to share your server’s IP address (this is also the address you connect to when you connect remotely). If you no longer have the IP address of your Minecraft server handy, you can find it out at any time in the Cloud Panel (under Infrastructure > Server). If you assign a domain to your server, users can also join using the Minecraft server domain.
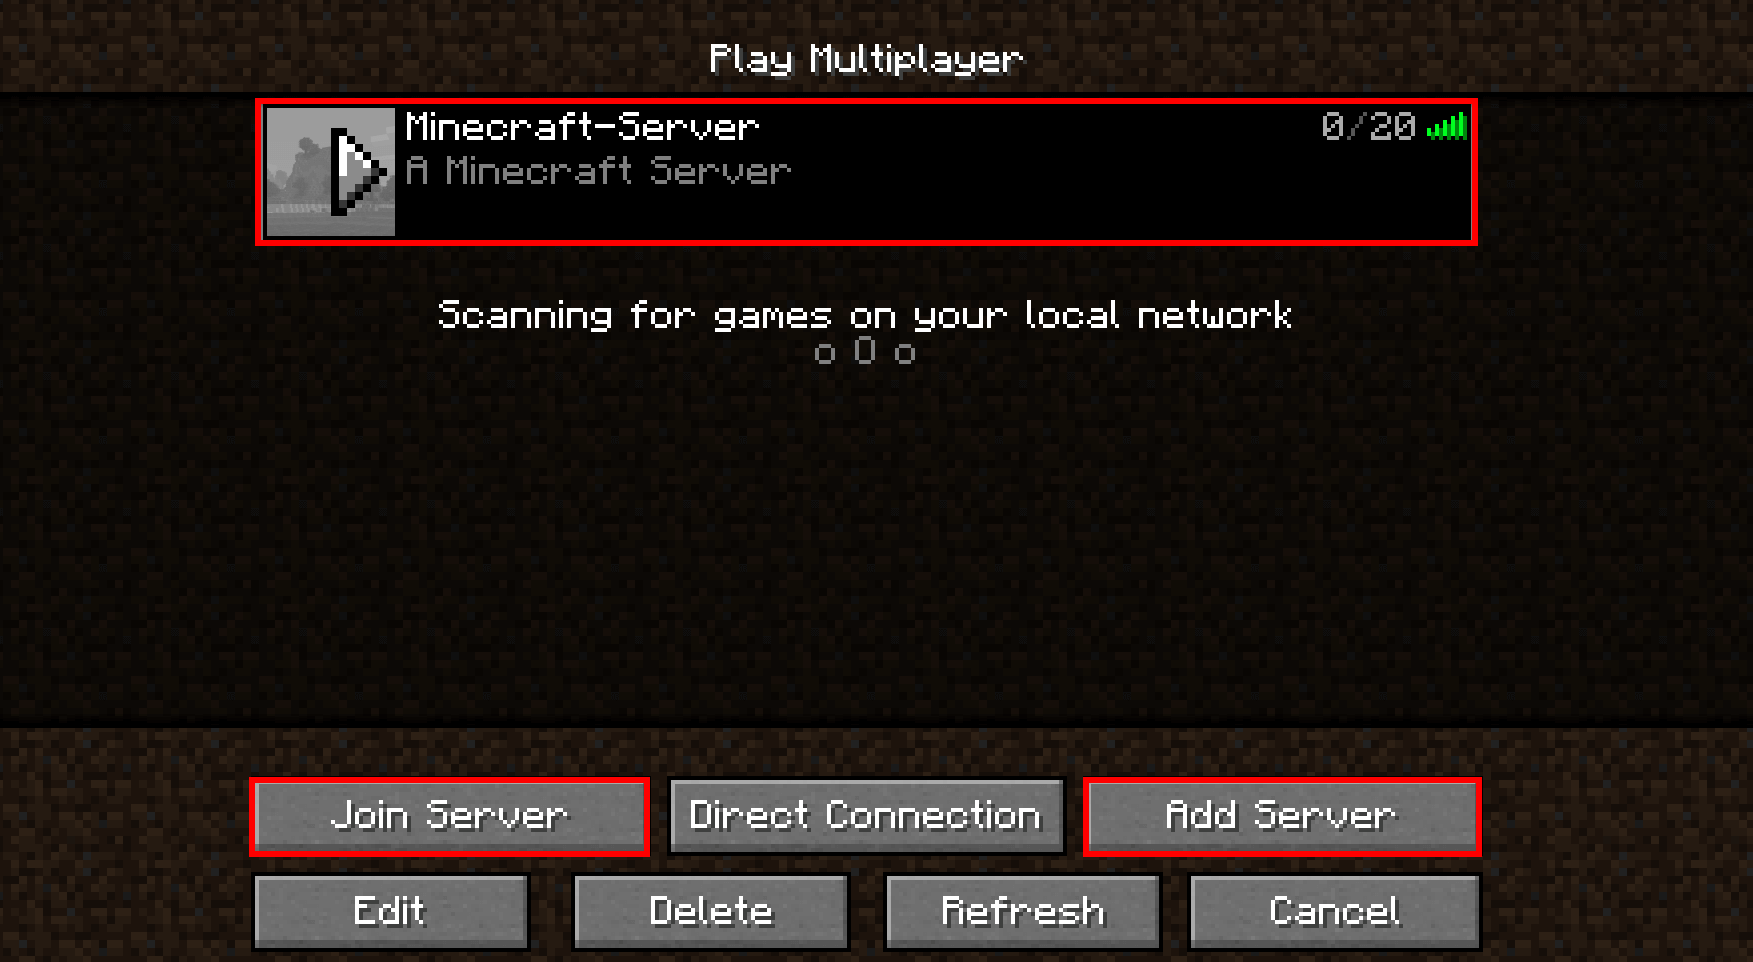
To connect to the server, players now launch the Minecraft application and select the multiplayer section. After clicking on Add Server, they need to enter a server name of their choosing as well as the address of your server. After clicking on Done, your Minecraft server will be available as a selectable server:
Step 6: Adjust Minecraft server settings
As a server admin, you can administer Minecraft servers as you wish and adjust your settings. This is done primarily via the server.properties file. You can set the number of players (“max-players=”), change the difficulty level (“difficulty=”), enable or disable PvP (“pvp=”) and make many other modifications. To do this, enter the desired number in the respective line or change the command to “true” or “false”.
For an overview of the various settings options, see the article about the server.properties file on the official Minecraft wiki.
Make a statement with your own .gg domain and let the games begin. Register your own .gg domain now with IONOS.
